Remote Desktop is one of the most powerful features in Windows 11 Pro, allowing you to access your work computer from anywhere in the world. Whether you’re working from home, traveling for business, or managing multiple computers, enabling Remote Desktop enhances your productivity. This comprehensive guide walks you through every step of the process, from initial setup to troubleshooting common issues.
Understanding Remote Desktop in Windows 11
Remote Desktop Protocol (RDP) has been a Windows staple for decades; however, Windows 11 Pro introduces enhanced security and improved performance. Unlike the Windows 11 Home edition, the Pro version includes the Remote Desktop host feature, allowing you to connect to it remotely. This distinction is crucial—you need to have Windows 11 Pro, Enterprise, or Education editions installed on the computer you want to access remotely.
What you can do with Remote Desktop:
- Access all your files and applications as if sitting at your desk
- Run resource-intensive software on your office PC from a lightweight laptop
- Provide technical support to colleagues without leaving your location
- Maintain multiple workstations from a single control point
The Remote Desktop connection functions exactly like working directly on the computer. Your mouse movements, keyboard inputs, and screen display all occur in real-time with minimal delay on a decent internet connection.
System Requirements and Edition Compatibility
Before starting the setup process, verify your Windows 11 edition. Press Windows key + I to open Settings, then navigate to System > About. Under Windows specifications, check that your edition shows “Pro,” “Enterprise,” or “Education.” If you see “Windows 11 Home,” you’ll need to upgrade to enable the Remote Desktop host functionality.
Technical requirements checklist:
- Windows 11 Pro, Enterprise, or Education edition (for the host computer)
- Administrative access to configure system settings
- Stable internet connection with a minimum 5 Mbps upload speed
- Router access for port forwarding (if connecting from outside your network)
- Current Windows updates installed for security patches
Your client device (the one you’ll use to connect) can run any Windows version, macOS, Linux, or even mobile operating systems through Microsoft’s Remote Desktop apps.
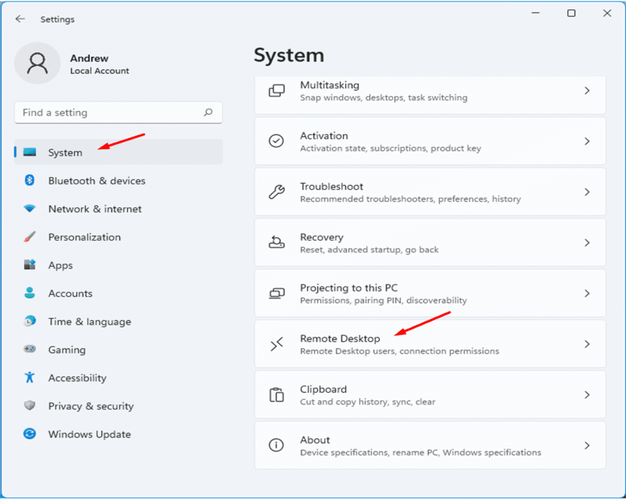
Step 1: Enable Remote Desktop in Windows Settings
Open Windows Settings by pressing Windows key + I. Click on “System” in the left sidebar, then scroll down and select “Remote Desktop.” You’ll see a toggle switch labeled “Remote Desktop.” Click this switch to turn it on. A confirmation dialog appears, warning you about security implications—click “Confirm” to proceed.
Necessary settings to configure:
- Leave “Require devices to use Network Level Authentication” enabled for security
- Consider enabling “Require computers to use Network Level Authentication to connect.”
- Note your PC name displayed on this page—you’ll need it for connections
Windows automatically creates the necessary firewall rules when you enable Remote Desktop, but third-party security software might require manual configuration.
Step 2: Configure User Permissions
Not every user account can connect via Remote Desktop by default. On the Remote Desktop settings page, scroll down to “User accounts” and click “Select users that can remotely access this PC.” Click the “Add” button to include specific users.
User permission best practices:
- Only grant access to accounts that genuinely need remote connectivity
- Ensure all remote users have strong, unique passwords (minimum 12 characters)
- Consider creating dedicated accounts for remote access rather than using administrator accounts
- Remove permissions immediately when employees leave or change roles
Accounts with administrator privileges can connect automatically, but it’s safer to create standard user accounts with elevated privileges only when necessary.
Step 3: Configure Network Level Authentication Setup
Network Level Authentication (NLA) adds an extra layer of security by requiring authentication before establishing a full Remote Desktop session. This feature is enabled by default in Windows 11 Pro and should remain active.
NLA security benefits:
- Prevents denial-of-service attacks on the Remote Desktop service
- Reduces resource consumption from unauthorized connection attempts
- Requires credentials before displaying the login screen
- Compatible with all modern Windows versions and RDP clients
Some older devices might not support NLA. If you absolutely must disable it for compatibility, understand that you are significantly reducing your security posture.
Step 4: Configure Windows Defender Firewall
Windows automatically configures firewall rules for Remote Desktop, but it’s worth verifying that these rules are in place. Search for “Windows Defender Firewall with Advanced Security” in the Start menu. Click “Inbound Rules” and look for “Remote Desktop – User Mode (TCP-In)” rules.
Firewall verification steps:
- Ensure Remote Desktop rules show green checkmarks (enabled status)
- Verify regulations apply to the correct network profiles (Domain, Private, Public)
- If rules are missing, manually add them for TCP port 3389
- Consider creating custom rules limiting connections to specific IP addresses
Third-party antivirus software often includes its own firewall. Check your security software’s settings to ensure it’s not blocking Remote Desktop connections.
Step 5: Find Your PC Name and IP Address
You need your computer’s name or IP address to establish connections. Your PC name appears in Settings > System > About under “Device specifications.” For the IP address, open Command Prompt and type ipconfig. Look for “IPv4 Address” under your active network adapter.
Connection information to record:
- Full PC name (example: DESKTOP-ABC123)
- Local IP address (example: 192.168.1.100)
- Public IP address (if connecting from outside your network)
- Default port number (3389 unless changed for security)
Your local IP address works only within your home or office network. For external connections, you’ll need your public IP address and router configuration.
Connecting from Another Device
On your client device, search for “Remote Desktop Connection” in Windows or download Microsoft Remote Desktop from the App Store (for Mac) or Google Play (for Android). Enter your PC name or IP address, click Connect, and enter your username and password when prompted.
First connection checklist:
- Test the connection from another computer on the same network first
- Verify credentials work before attempting external connections
- Accept the security certificate warning (appears on first connection)
- Save connection settings for quick access in the future
The initial connection might take longer as the computers establish encrypted communication channels.
Troubleshooting Common Windows 11 RDP Issues
If connections fail, start with these diagnostic steps. Verify that both computers have active internet connections. Confirm that the host computer hasn’t entered sleep mode—adjust the power settings to prevent it from sleeping when plugged in. Check that you’re using the correct username format (sometimes requires COMPUTERNAME\username).
Common problems and quick fixes:
- “Remote Desktop can’t connect” – Verify Remote Desktop is enabled and firewall rules are active
- Authentication failures – Reset password and ensure the account has remote access permissions
- Black screen issues – Update graphics drivers and disable display scaling
- Slow performance – Reduce color depth and disable visual effects in connection settings
Many connection problems stem from sleep mode. In Power & battery settings, set “When plugged in, put my device to sleep after” to “Never.”
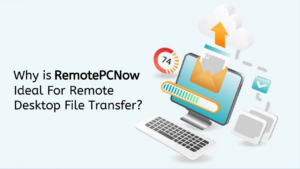
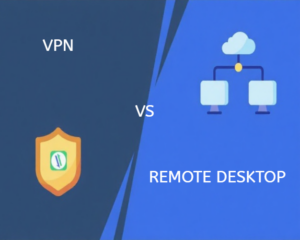
Alternative: Using RemotePCNow Instead
While Windows’ built-in Remote Desktop works well within networks, it requires complex router configuration for external access. RemotePCNow offers a simpler alternative with cloud-based connectivity, eliminating the hassles of port forwarding. The software works across all Windows editions, including Home, and provides superior security with automatic encryption and two-factor authentication.
Stay Connected with RemotePCNow
Need more Windows 11 tips and remote access guidance? Follow us on Facebook, Instagram, LinkedIn, and X for tutorials, troubleshooting advice, and feature updates. Do you have specific questions about setting up a remote desktop, or are you looking for a more straightforward solution? Visit our Contact Us page—we’re here to help you work remotely with confidence.